Who needs gradient descent? Getting to grips with Nevergrad.

Introduction
Nevergrad is an interesting and quite wonderful Python library that I’ve grown fond of over the last few months. It provides tooling to run numerical optimization without having to rely on computing the gradient of the function you’re optimizing (in stark contrast to the current algorithm du jour of the deep learning world, gradient descent). Think evolutionary algorithms, particle swarm optimization and so on.
I like a few things about nevergrad, and it’s since become my go-to tool for ad-hoc
optimization problems, mostly due to how easy it has been to drop into
my code. So, today, I’d like to talk about nevergrad for a bit.
What I really like about Nevergrad
My appreciation for nevergrad boils down to two things:
- Easy of use
- Flexibility
As you’ll see in the example latter on, nevergrad is surprisingly quick to
integrate into your existing code. From an end-user’s point of view, it’s almost
impossible to overstate how important it is to minimize the time between “zero”
and “Hello world!”. To begin optimizing with nevergrad, it takes only a couple
lines of code. I love this aspect. This emphasis on designing the API so that
you can be productive immediately is something I increasingly appreciate in
software that chooses to optimize developer productivity. Full marks.
Despite this, nevergrad is also relatively flexible. Utilizing “gradient-free”
optimization means you don’t need to worry about having your code be
differentiable by some opaque backend. This allows you to wrap any function
you wish, with no additional modification required on your part. As long as you
output some kind of computed loss that you want minimized, you can use nevergrad. No
matter the control flow. This makes it especially handy when you’re trying to
figure out hyperparameters for a certain process – you don’t need to modify
your code to make it compatible. Just wrap nevergrad around it and away you
go. For example, I once
wrapped a process that involved training an ML model, followed by running an ODE
numerical solver, before finally calculating a set of metrics, each with their
own set of tunable parameters. I was able to find a close-to-optimal solution
using nevergrad without having to modify any of the process code.
A basic example
As always, an example is (usually) best. Imagine you want to find the minimum point of the following parabola:
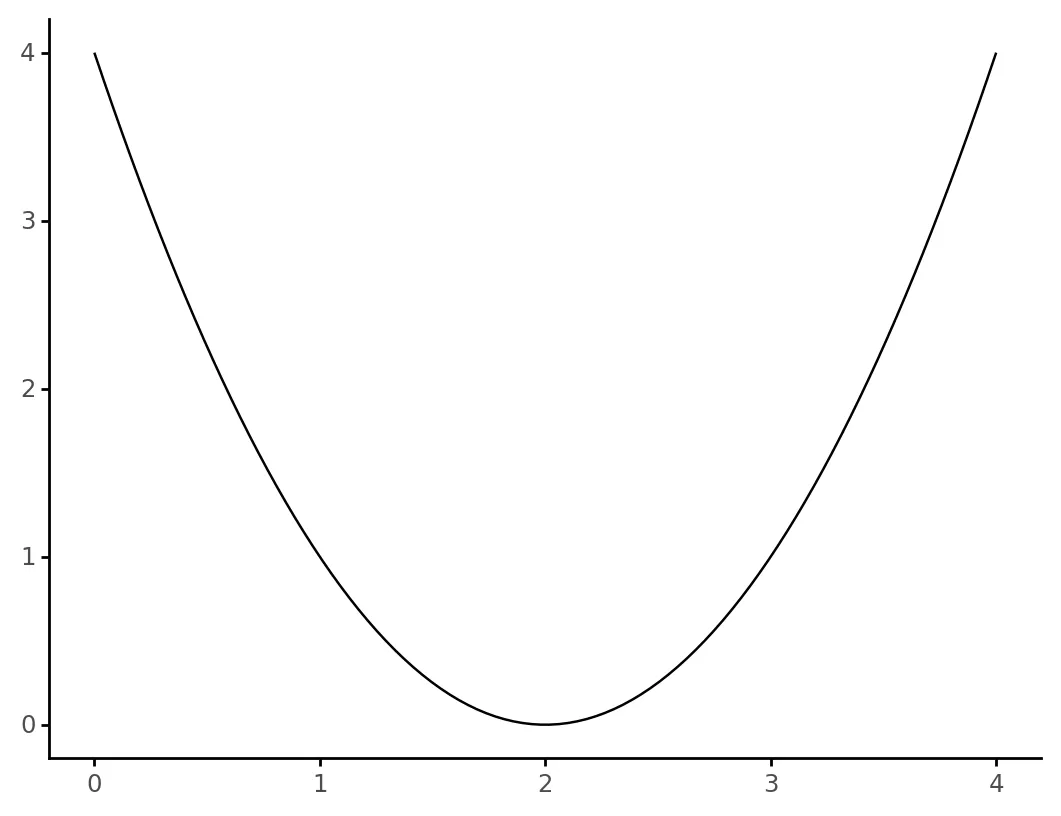
which has the following expression: $$ y = (x - 2)^2. $$
With nevergrad, all we need to do is this:
import nevergrad as ng

def square_function(x):
    return (x-2)**2

x_arg = ng.p.Scalar()  # Define our argument to the function
instru = ng.p.Instrumentation(x_arg)  # Package it as "instrumentation"

optimizer = ng.optimizers.OnePlusOne(parametrization=instru, budget=100)  # Choose an optimizer, passing through our instrumentation
recommendation = optimizer.minimize(square_function)  # Find the minima!
print(recommendation.value)

# >>> ((1.9998271159560648,), {})
In other words,
- Define our function.
- Define our input arguments to the function This happens to be the explicit way of defining our instrumentation. There is convenient short-hand as well. (there are lots to choose from, including integer values and choices!)
- Choose our optimization algorithm.
- Optimize.
Nice!
A more practical example: hyperparameter optimization
A more practical example (and one where I originally discovered the value of
nevergrad) is for hyperparameter optimization.
While working on my PhD I encountered the following problem. I wanted to predict a smooth curve (that I had measured) by adding together a number of scaled smooth kernels. And I would scale the kernels according to some input data.
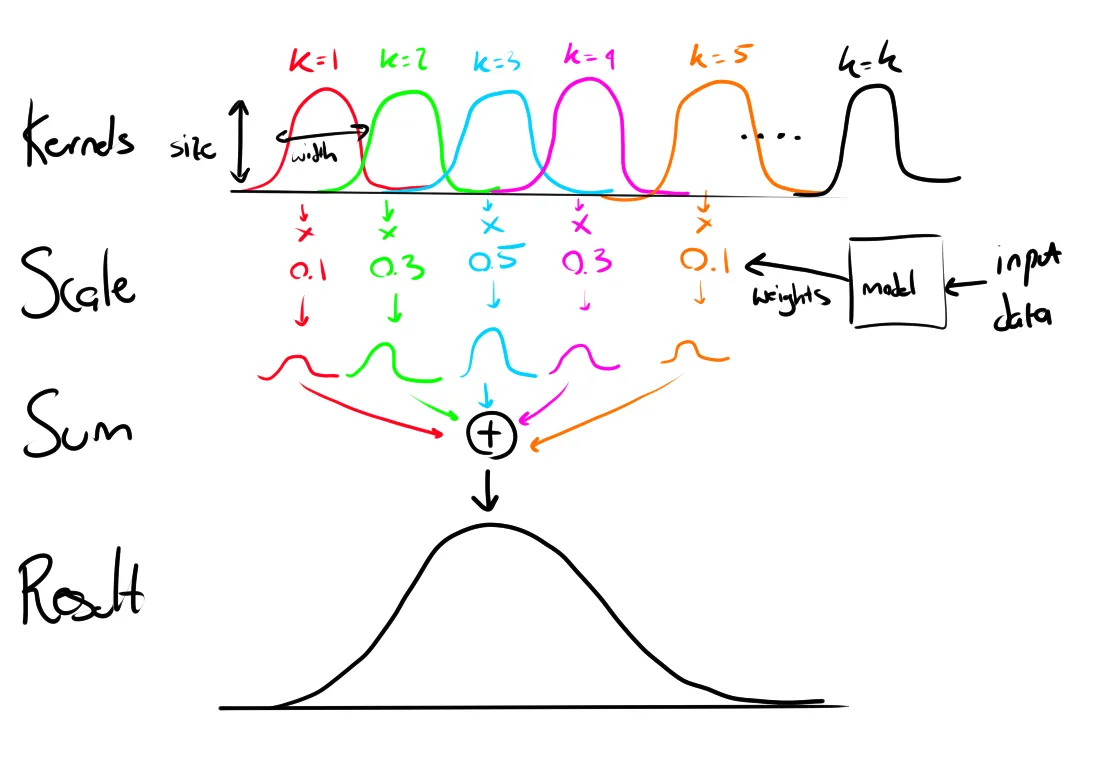
So, the general process was “scale” each of the kernels according to data, then add them together to create the final smooth curve. The code looks something like this:
X, y = create_training_data(samples)
X = make_features(X_train)

kernels = make_kernels(num_kernels, size, width)

model = train_model(X, y, kernels)
y_hat = model.predict(X)
score = mean_squared_error(y, y_hat)
The model would give me the weights of each kernel, but:
- How many kernels should there be?
- What size should each kernel start as?
- What width should each kernel be?
Choosing the right (or wrong) values for the above parameters (number of kernels, their size and their width) would dramatically effect the accuracy of the final smooth curve.
I could try every possible combination of values, and choose the one that
works the best, but this is an incredibly time consuming process. I have
thousands of these smooth curves I want to predict, and training the model takes
too long to make this an attractive option. So let’s use nevergrad to find a
optimal set of hyperparameters instead.
First, we need to wrap our above code in a function that we can optimize over:
def calculate_model_score(num_kernels, size, width):
    X, y = create_training_data(samples)
    X = make_features(X_train)

    kernels = make_kernels(num_kernels, size, width)

    model = train_model(X, y, kernels)
    y_hat = model.predict(X)
    score = mean_squared_error(y, y_hat)
And do our instrumentation and optimization as before: Notice here that we also further customize our instrumentation by setting upper and lower limits, and make sure the number of kernels is an integer.
num_kernels = ng.p.Scalar(lower=10, upper=60).set_integer_casting()
size = ng.p.Scalar(lower=0.001, upper=10)
shape = ng.p.Scalar(lower=0.0001, upper=0.01)

instru = ng.p.Instrumentation(num_kernels, size, shape)
optimizer = ng.optimizers.OnePlusPne(parametrization=instru, budget=300)
recommendation=optimizer.minimize(calculate_model_score)
print(recommendation.value[0])
# >>> (53, 1.8828894598055905, 0.004852569379631386)
And there we have it, 53 kernels with a size of 1.882 and width of 0.0048 gives us our best result. Note:
- We didn’t have to modify any of the logic in our code (just wrap it in a self-containing function)
- We had to add ~7 independent lines of code (less, if you want to be more terse).
It’s refreshing to have a tool this useful integrate so easily and seamlessly
into your existing code, and this is often why I find myself reaching
for nevergrad instead of refactoring code to work with something else, like
jax. Sometimes some quick-and-dirty optimization using an evolutionary
algorithm can be good enough (not to mention fast). Sure, this particular
example isn’t the ideal candidate for gradient descent, but refactoring so that
these kernel parameters become model parameters, and then optimizing using
jax and gradient descent is something that I’ve done before. It worked too
– but it took a lot longer than simply plugging in nevergrad.
Oh, I’m we’re barely scratching the surface of what nevergrad can do,
particularly when interacting with ML
workflows.
Closing thoughts
And that’s nevergrad, the optimization library that doesn’t use gradient
descent. It’s easy to use (and easy to integrate), very flexible and has a
decent API. I happen to like it a fair deal, and expect to use it more
frequently in the future. If it sounds like something you’re interested, I can
highly recommend it. Check out the
documentation, if you
want to read more.
Till next time,
Michael.